Techniques for the Perfect Finishing Touch of Best Tile Installation
Tile laying can be a prominent operation and requires proper knowledge of the material and methods applied and great attention to detail. Whether you are an experienced DIY enthusiast or are getting help from professionals of tile installation, it is equally important for the best tile installers in the country to master the proper techniques to achieve a long-lasting and visually appealing result.
1. Understanding Tile Types and Their Applications
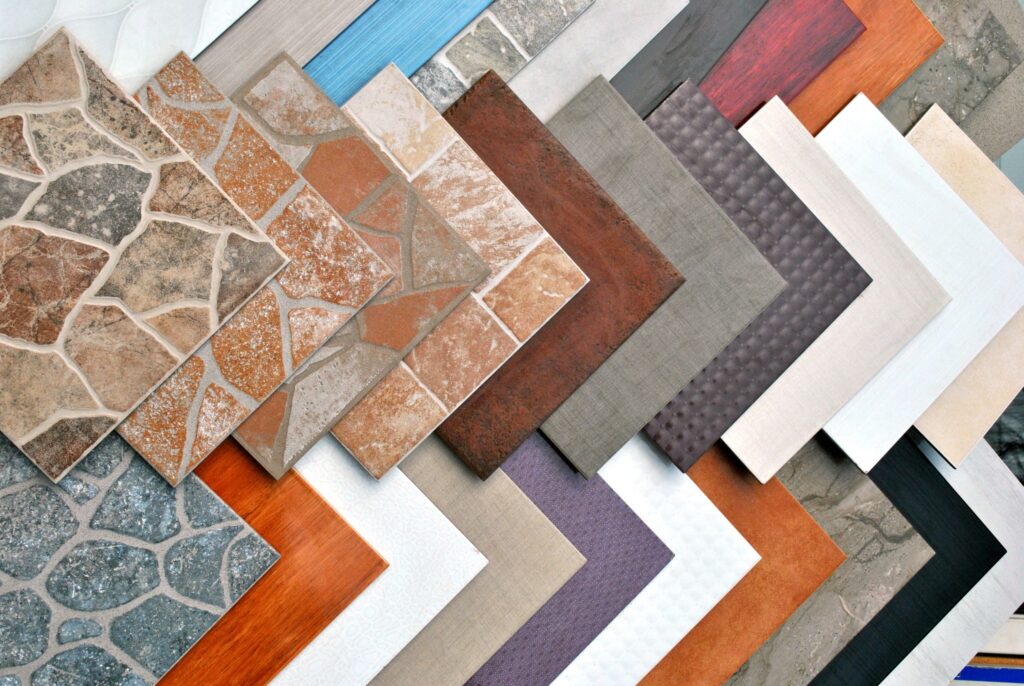
Before installation, it is important to know the type of tiles and their uses. Each type has unique property kinds that are ideal for certain parts of your home or commercial premise.

Ceramic Tiles
Ceramic Tiles are ideal for walls and low-traffic areas. They are malleable in that they can be easily cut and installed but they do not stand up well in terms of durability.
Porcelain Tiles
Porcelain Tiles are thicker and stronger than ceramic tiles, thus very well suited for floors and areas with high traffic. They are also water-resistant and, therefore, suitable for bathrooms and kitchens.
Glass Tiles
On the other hand, they are more suitable for decoration or accent pieces, such as backsplashes. They are more brittle and difficult to cut, but they have a unique glass-like finish.
Natural Stone Tiles
These vary from marble and granite to travertine. They are very durable but need sealing and regular maintenance.
Vinyl Tiles
A commercial favorite because they are durable, cost-effective, and relatively easy to lay. Plus, leading commercial vinyl flooring specialists highly recommend them for intense footfall areas.
2. Surface Preparation
Proper surface preparation is the basis for a successful tile installation. Whether the surface is a floor or a wall, proper cleaning and leveling are crucial.
Cleaning of Surface
All dust, dirt, and grease must be cleaned. In the case of a previously tiled surface, all old tiles, glue, and grouting should be removed.
Smoothening
Bad surface inflicts uneven tile; thus, a flat surface is absolutely necessary. For that purpose, a leveling compound can be applied to fill in any dips or irregularities on the floor or wall.
Drying the Surface
Allow it to dry entirely, especially those areas that are highly exposed to moisture. The step is quite crucial to prevent mold growth and to make good tile adhesion.
3. Choose the Proper Adhesive
Selecting the proper adhesive can help ensure a commercial tile installation that will last. Different adhesives are used with different tiles, and it also depends on the material of the surface.
Cement-Based Adhesives
They are ideal for most tile or surface types. They are strong and durable, and latex additives can be supplied to modify them for greater flexibility.
Epoxy Adhesives
It is used in areas highly exposed to chemicals or heavy moisture, such as commercial kitchens or bathrooms. Excellent adhesion, water, and stain resistant.
Pre-Mixed Adhesives
Easy to use for smaller DIY projects, especially on walls, but they will not stay on as well as cement-based adhesives would.
4. Layout and Planning
A professional-appearing tile installation requires a little forethought in layout. Dry the tiles prior to applying adhesive or setting them in place.
Dry Laying Tiles
Lay tiles out without adhesive to view the pattern and verify the proper alignment of the tiles. This procedure avoids awkward cuts and ensures a balance of your overall layout.
Guideline Marking
Mark chalk line guidelines or laser levels on the surface for guidelines that will help in maintaining straight rows with equal spacing of the tiles.
Starting Point
Start affordable tile installation from the center of the room or a focal point on the wall and work outwards. This method ensures that cut tiles, if any, fall at the edges, which will be less noticeable.
5. Tile Cutting
Cutting tiles is a task that requires skill and the right supply but also ample patience. And of course, whether working with ceramic, porcelain or stone tiles, precision is key in order to avoid cracks and to assure the tile fits flush.

Tile Cutter
For straight cuts in ceramic and porcelain tiles, a manual tile cutter is appropriate. “Score” the tile using the cutter. Once scored, a piece can be “snapped” along the scored line.
Wet Saw
A wet saw is used for thicker and harder materials, such as natural stone. The tool features a stream of water to cool it down and reduce dust for clearer, more precise cuts.
Tile Nippers
Tile nippers make all sorts of small and complicated cuts needed for shaping a tile around an obstacle. It bites away little by little to form the tile in the required shape.
Measuring and Marking
Always measure and mark your cuts before cutting. Draw cutting lines on the surface of the tile with a pencil or a grease pen.
6. Fitting the Tiles
After the surface preparation, laying out a layout, and cutting the tiles, it is time for laying. The most important attention to detail in the work:
Applying Adhesive
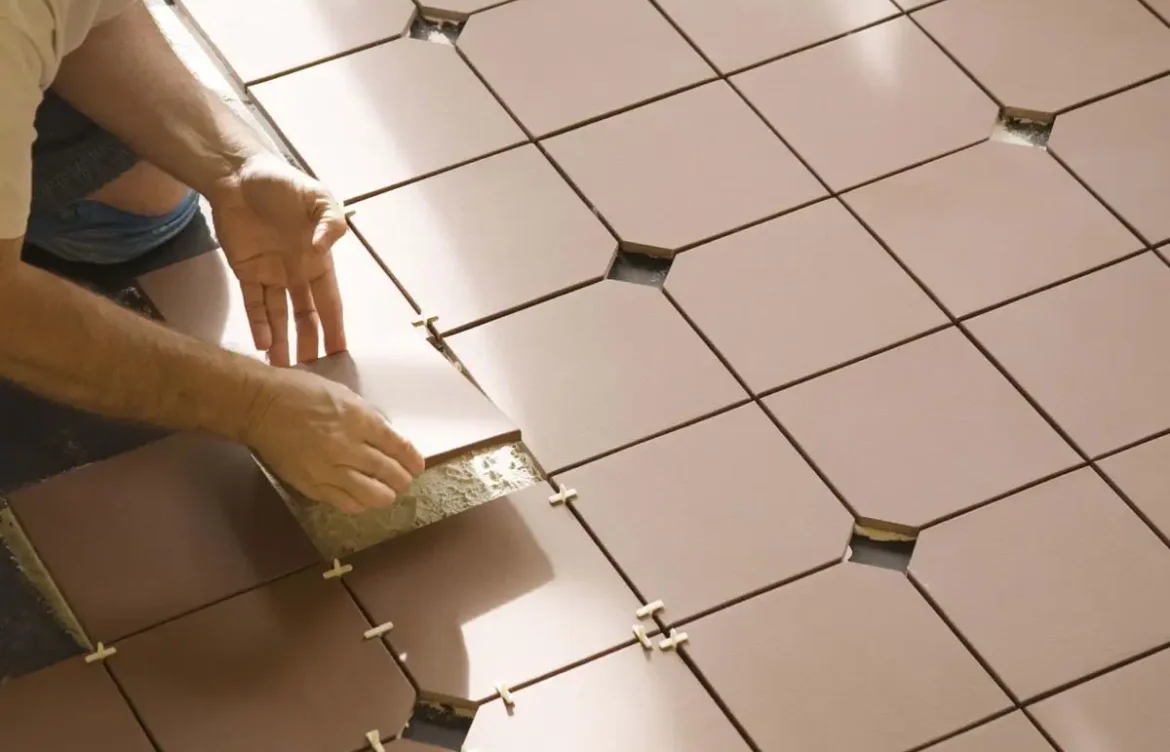
The main troubles are the straight position of the tiles relative to each other and their total attachment to the surface. Spread the adhesive evenly across the surface with a notched trowel.
Setting the Tiles
The notch size varies depending on the size of the tile; adjust the trowel size so that properly sized gaps are explored, allowing for good contact.
Laying the Tiles
Push the tiles firmly into the adhesive, twisting slightly to ensure complete contact. Spacers are used to make an even space between the tiles.
Checking Alignment
Ensure that the tile alignment is checked frequently with a level. Make necessary adjustments before setting the adhesive.
Tile spacers
Remove the tile spacers when the adhesive begins to set so that they are not permanently embedded in the adhesive.
7. Grout to Tiles
Grouting helps to fill the gaps between the tiles. It also helps in giving a finishing to your tile and also avoids the moisture from residing inside the tile. The right kind of grout should be selected and applied in the right manner.
Grout Mixing
Mix the grout according to the manufacturer’s instructions until it is the consistency of peanut butter. Also, make sure it is free from lumps to achieve a smooth application.
Applying the Grout
Grout is applied on tiles with a rubber float pressing into the joins at a 45 degree angel. Make sure you apply the grout in little sections since it dries very quickly and you may apply it inappropriately.
Sealing the Grout
When the grout has fully cured, apply a grout sealer across the surface so that it will be protected from stains and moisture—another must-do especially in those wet locations, such as a bathroom or a kitchen.
8. Tile Maintenance and Care
Proper care will prolong the life of your tiles and keep them looking new. If you have ceramic, porcelain, or vinyl tiles, regular cleaning and care is equally important. Regular Cleaning: Sweep or vacuum floors on a regular basis to eliminate dirt and debris that scratch the tiles. Wipe down wall tiles with a damp cloth to prevent any kind of build up.

Avoid Abrasive Cleaners
Use only pH-neutral cleaners made for your type of tile. Harsh chemicals will eat away at your tile or grout.
Sealing Natural Stone
For those who have natural stone tiles, you’ll need to reseal the tiles regularly to keep up their surface appearance and protect them from stains.
Vinyl Tile Maintenance
You ought to clean vinyl according to the manufacturer’s recommendation using an appropriate cleaner, avoiding wax, which can result in an extreme shine and slippery surface to walk on.
9. Tile Installers Professional Services
Though it may be rewarding to do yourself, jobs melded with the best tile installers company ease the task of tile installation, especially in oversized or complicated projects. Professionals have the tools, experience, and expertise to handle those downright challenging installations, from intricate patterns up to the heavy-duty commercial flooring of vinyl-type materials.
Expertise and Precision
Professional installers are trained and experienced in making precise cuts, ensuring perfect alignment while applying even grout.
Time and Efficiency
Professionals save your time and ensure the job is done efficiently—no delays or mistakes typical with DIYs.
Quality of Material
Professional installers normally have sources for quality materials and adhesives to make sure that the quality of their installation work stands the test of time.
Warranties or Guarantees
Professional tile installation services often provide warranties, offering assurance and peace of mind that your investment is insured.
Conclusion
Installing tiles is an art that combines technical ability and creativity. The mastery of techniques learned through this blog will make the difference between professional quality and ultra-low-budget finishes that will mark the area. Whether you go DIY or contract the best tile installation service available, these effective techniques will ensure the correct installation of your tiles so that they will sparkle and stay put for years.
